
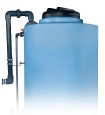
The Importance of Annual Chemical Storage Tank Inspection
To maintain safe storage of chemicals and proactively detect cracks, weak seams and fittings, and other storage tank stress points that could develop into potential leaks or spills, a comprehensive annual chemical storage tank inspection is strongly recommended. Even if the polyethylene tank is relatively new, a routine and careful visual inspection is suggested.
Here is an annual tank inspection checklist. Follow these steps and conduct a storage tank inspection at least annually to ensure the safety of personnel and the preservation of the chemical stored. Whenever indications or signs of stress cracking, crazing, or embrittlement are discovered, the chemical storage tank should be replaced.
Annual Chemical Storage Tank Inspection Checklist
- First of all, empty the storage tank. Any chemicals remaining must be neutralized. The outside and inside of the tank must be completely and thoroughly cleaned. It’s impossible to properly inspect a dirty tank.
- Cracking, crazing and brittle appearance are the first indications of tank leaks. Examine the tank to pinpoint these signs.
- The areas around fittings and where different portions of the tank converge into one another are the area of storage tanks that typically show signs of weakness. Pay close attention to these areas of the tank in your inspection. For instance, closely examine the tank “corners” where sidewall and dome of the storage tank meet and where sidewall and bottom meet.
- Inspecting the interior of the storage tank is crucial because cracks typically start on the inside of the tank initially. Inspecting the inside of the tank is always challenging since it’s usually not possible to physically enter the inside of the storage tank. Use a high powered, bright light to thoroughly examine the inside of the tank from the manway opening.
- The dome of a chemical storage tank can become brittle from chemical fume exposure. Because the tank vent emits chemical fumes, oxidation can occur. Carefully inspect the dome and all areas of the tank that do not come in direct contact with chemicals but are exposed to fumes and potential oxidation breakdown.
- Fittings, hoses, gaskets, and all connections. All storage tank fittings, flexible connection hoses, and gaskets must be carefully inspected to detect any signs of general corrosion or deterioration and leaks. Any defective fitting, hose, or gasket must be replaced immediately.
- Adequate venting for pressure and vacuum is essential in all chemical storage tanks. Check the vents and scrubber piping and make sure they are functioning properly. Ensure end of scrubber piping is never submerged in more than 6 inches of liquid.
- Confirm that filling of the tank from tanker trucks is not causing over pressurization and not ending with a line purge that “balloons” the tank. Please refer to this article for proper chemical storage tank venting.
- Is the secondary containment of the chemical storage tank appropriate for chemical stored, adequate in size, and in good condition? In the event of a leak or spill, will the secondary containment function to minimize the risk of contamination?
It’s important to conduct a poly tank inspection to prevent injury and property damage from leaks and spills of chemicals. These nine steps follow the basic annual chemical storage tank checklist. Please refer to the annual tank inspection checklist for a printable, checklist copy to document the inspection and for vital storage tank inspection warnings.
Need advice about an aging tank or see indications of wear during your inspection?

Posts By Topic

Tech Talk Podcast Episodes
Subscribe By Email
Recent Posts
- Flexible Connectors and Isolation Valves: Why Correct Installation Protects Your Chemical Storage Tank
- Why ASTM D-1998 Still Matters: The Standard That Separates Serious Tank Manufacturers from the Rest
- Brine Storage Tank Solutions: Material and Manufacturing
- Understanding Pressure Limits in Polyethylene Chemical Storage Tanks
- Easy Level Monitoring with the Reverse Float Level Gauge
Tank Configurator
Find the recommended tank and system components for your chemical storage challenge.
Configure a Tank Package